

Publié par : Bastien Le Goffic — Rédacteur en chef
Replacing shock absorbers is not just a comfort job. These parts control rebound, keep the wheels pressed against the road, and help the car stay stable under braking, cornering, and over uneven surfaces. An experienced DIY mechanic can do the work, but front shock absorbers often sit inside a spring-and-strut assembly, so safety comes first.
The main danger is not the shock absorber itself, it is the suspension spring, which is held under very high pressure. Before starting, be clear about the vehicle layout, the tools needed, and the point where the spring has to be compressed. If that still feels uncertain, professional installation is the safer option.
What shock absorbers do before you decide to replace them
Shock absorbers are part of the suspension system, but they are not the suspension as a whole. The suspension includes the parts that support the vehicle and keep the tyres in contact with the road. The shock absorber’s job is to control movement, limit wheel and chassis oscillation, and stop the spring from bouncing freely after a bump.
Vérification des points clés sur les amortisseurs
In a hydraulic shock absorber, a piston moves inside an oil-filled cylinder. When the car hits an obstacle, the piston forces oil through internal passages and creates resistance. That resistance slows the movement of the suspension and makes the vehicle easier to control.
Why worn shock absorbers matter
Worn shock absorbers do more than make the ride feel soft or unsettled. They can increase braking distance, accelerate tyre wear, and contribute to premature wear of other vehicle components. According to Centre de l’Auto RG, shock absorbers worn by 50% already have a significant impact on the vehicle, braking distances, and tyres.
Typical warning signs include repeated bouncing after a bump, unstable handling, nose-diving during braking, uneven or premature tyre wear, and reduced comfort. If several of these symptoms appear together, the shock absorbers should be inspected quickly rather than treated as a minor comfort issue.
When damping weakens, the wheel can skip, chatter, or float just enough for the driver to adapt without noticing the change at first. The result is often earlier braking, more steering corrections, and a car that feels less settled on rough roads. The pattern is usually clear once tyre wear, body movement, braking feel, and wheel contact are checked together.
Tools and safety checks before changing shock absorbers
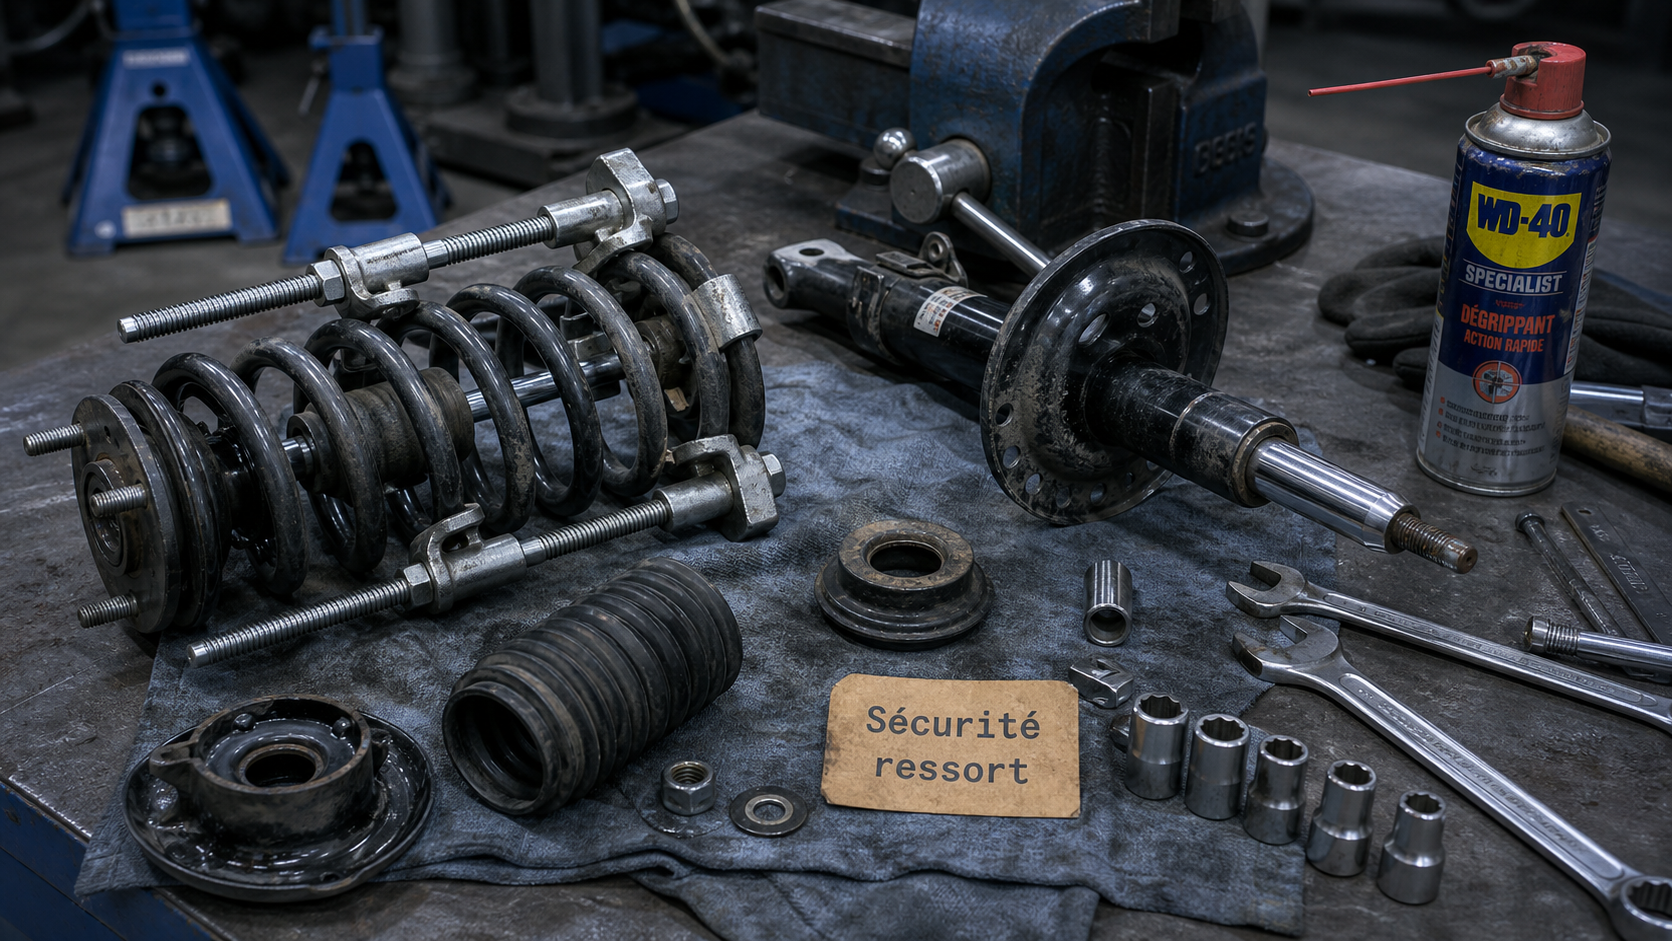
On many front axles, the shock absorber and spring are combined in a suspension strut. In that case, a spring compressor is required to separate the spring from the shock absorber safely. You should also have suitable lifting equipment, jack stands, penetrating oil, wrenches, and, depending on the vehicle, a hammer or mallet and a metal bar used carefully as a lever.
The essentials are straightforward. Jack stands are non-negotiable, penetrating oil helps on seized fasteners, and the right wrench size matters when the top mount bolts are stubborn. Mister-Auto mentions a size 13 wrench for the top mount bolts in its procedure.
- Jack stands, because the vehicle must never be supported only by a jack.
- Spring compressor, because it is essential when the spring and shock absorber are assembled together.
- Hammer or mallet, sometimes used on the metal support of the suspension strut, not on fragile parts.
- Metal bar, which may help release the strut if it is used with controlled force and care around hoses and cables.
The central nut warning
The upper central nut can retain the spring and shock absorber assembly. It may be loosened in some procedures, but it must not be removed before the spring is safely compressed. If it comes off too early, the spring can escape suddenly and cause damage or serious injury.
Follow the spring compressor instructions carefully. The compressor must sit correctly on the spring coils, tighten evenly, and be checked throughout the operation. If the spring does not sit securely in the compressor, stop and reset the setup rather than forcing the dismantling sequence.
Front shock absorber replacement: the practical sequence
Front shock absorber replacement is usually more complex than rear replacement because the front assembly often combines the spring, shock absorber, top mount, and suspension strut. Mister-Auto states that front shock absorber assembly can be performed in 21 steps, which shows the number of operations involved rather than a quick bolt-on repair.
1. Raise, secure, and prepare the vehicle
Park on a stable, level surface, loosen the relevant wheel bolts slightly, then raise the vehicle and support it on jack stands. Raising the vehicle removes compression from the front axle and gives access to the suspension components. Remove the wheel on the side being repaired, or both wheels on the axle if you are replacing shock absorbers in pairs.
Apply penetrating oil to the fasteners at the lower shock absorber support and the stabilizer bar fixing bolt. Let it work before trying to remove anything, especially on older vehicles where rust or road grime can make the bolts difficult to loosen.
2. Disconnect what holds the strut in place
Depending on the design, the stabilizer bar link may need to be disconnected. The shock absorber or suspension strut can be attached to the hub carrier or suspension arm by two screws in one common configuration, or by one screw in another. Remove the appropriate fasteners while supporting the assembly so it does not pull on brake hoses or sensor cables.
Before extracting the strut, unclip any cables and flexible hoses attached to it. This detail is easy to overlook, but it prevents stretching or damaging brake hoses, ABS wiring, or other nearby lines when the strut is moved away from the hub carrier.
3. Release the top mount and remove the assembly
The top mount is located at the upper part of the wheel arch or suspension tower. Mister-Auto indicates that it is generally fixed to the bodywork at 2 or 3 points, while Oscaro describes top mount fixings that may use 2, 3, or 4 screws or nuts depending on the design. Some vehicles also use a central nut arrangement.
Remove the top mount fixings according to the vehicle layout, while keeping control of the strut assembly. Once the lower and upper fixings are free and all hoses or cables are unclipped, the shock absorber and spring assembly can be extracted from the wheel arch.
Compressing the spring and handling the main configurations
Once the assembly is out, you can see the shock absorber, spring, top mount, and often the dust boot or protective bellows. This is the stage where patience matters most. The spring must be compressed before the top mount is freed and before the shock absorber is separated from the spring.
Combined spring-and-strut assembly
Fit the spring compressor securely on opposite sides of the spring and tighten both sides evenly. The goal is to relieve pressure from the top mount, not to distort the spring. When the spring is compressed enough that it no longer pushes against the mount, the top mount can be removed safely according to the assembly design.
At this point, the old shock absorber can be separated from the spring. Inspect the spring, top mount, and dust boot before reassembly. Reusing a damaged protective bellows or worn top mount can undermine the repair, because those parts help protect and locate the new shock absorber.
Cartridge shock absorber
Some vehicles use a cartridge shock absorber inserted inside the suspension strut. The cartridge is held by a tightening ring. In this case, the procedure can involve removing the strut and hub carrier assembly in one block. Depending on the configuration, steering and suspension ball joints and even the brake caliper may need to be disconnected.
This cartridge layout is more variant-sensitive than a simple visual check suggests. If the shock absorber is retained inside the strut by a ring, do not treat it like a standard external strut without confirming how the cartridge is secured and removed.
| Configuration | What to watch | Main safety point |
|---|---|---|
| Combined front spring and shock absorber | Spring, top mount, dust boot, strut | Compress the spring before freeing the mount |
| Strut fixed to hub carrier | One or two lower fixing screws | Unclip hoses and cables before extraction |
| Cartridge shock absorber | Tightening ring inside the suspension strut | Identify the cartridge system before dismantling |
DIY or professional replacement: how to make the right call
Changing shock absorbers can save labour costs, but it is not a beginner-friendly operation when a compressed spring is involved. The decision should depend less on confidence and more on equipment, experience, and the vehicle’s configuration. If you do not have jack stands, a reliable spring compressor, and enough mechanical experience to identify the top mount, stabilizer link, hub carrier, and attached hoses, the job belongs in a workshop.
There are cost implications beyond the shock absorber itself. Worn shock absorbers can accelerate tyre wear and general vehicle wear, so delaying replacement may increase expenses elsewhere. On the other hand, a poorly executed replacement can damage components or create a safety issue, which may cost more than professional installation.
After reassembly, check that all fixings removed during the work are back in place, that hoses and cables are clipped correctly, and that the top mount and lower strut connections are secure. If anything feels abnormal during the first careful drive, stop and inspect the work. Suspension repairs affect braking, steering response, tyre contact, and road holding, so they deserve a final verification, not just a finished-looking assembly.